Mastering How to Draw Realistic Portraits
how to draw realistic portraits

Mastering How to Draw Realistic Portraits

Transform your artistic skills and capture lifelike human features with precision and passion.

Start Your Portrait Journey

Key Takeaways

  • ✓ Understanding facial anatomy is crucial for realistic proportions.
  • ✓ Layering and blending are essential for smooth, lifelike skin tones.
  • ✓ Reference photos are invaluable tools for capturing accurate details.
  • ✓ Practice and patience are the most important ingredients for success.

How It Works

1
Gather Your Essential Materials

Select high-quality pencils, paper, erasers, and blending tools tailored for portraiture. Good materials provide better control and results.

2
Master Basic Proportions and Anatomy

Learn the fundamental ratios and structural landmarks of the human face. This forms the bedrock for accurate and believable features.

3
Practice Form and Value Shading

Develop your ability to see and render light and shadow to create three-dimensional forms. Gradual layering is key to realistic skin texture.

4
Refine Details and Textures

Focus on the subtle nuances of eyes, nose, mouth, and hair. Observe and replicate the delicate textures that bring a portrait to life.

The Foundation: Understanding Facial Anatomy and Proportions

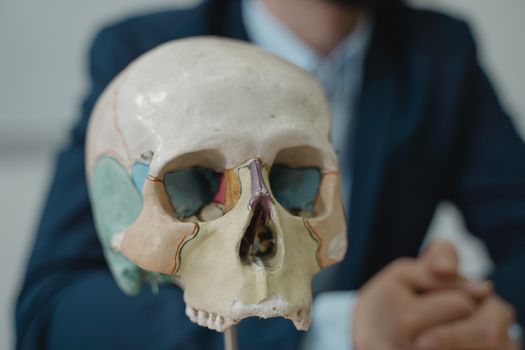
Embarking on the journey of how to draw realistic portraits begins with a deep understanding of facial anatomy and proportions. Without this foundational knowledge, even the most meticulous shading will fall short of creating a truly lifelike representation. Think of the human face as a complex architectural structure; each bone, muscle, and feature plays a specific role in its overall appearance. Start by familiarizing yourself with the 'Loomis Method' or similar proportional guides, which offer a simplified yet effective framework for placing features accurately. This typically involves dividing the face into thirds horizontally and halves vertically to establish guidelines for the hairline, brow line, nose, and chin. Beyond these basic divisions, delve deeper into the skull's structure. Understanding the underlying bone structure – the cranium, cheekbones (zygomatic arch), and jawline (mandible) – will inform how light falls on the face and how muscles attach, influencing expressions. For instance, knowing where the temporal bones meet the frontal bone helps in drawing the temples and the curve of the forehead. Similarly, recognizing the eye sockets (orbits) as spherical forms rather than flat planes is crucial for rendering realistic eyes. Muscles also play a vital role. While you don't need to memorize every single facial muscle, understanding the major groups responsible for expressions – such as the orbicularis oculi around the eyes, the zygomaticus major for smiling, and the depressor anguli oris for frowning – will enable you to convey emotion and character in your portraits. Practice drawing the skull from various angles, then overlaying simplified muscle groups. This exercise helps you visualize the three-dimensional form beneath the skin. Another critical aspect is understanding variations. While there are general rules, every face is unique. Observe how noses differ in shape and size, how lips vary in fullness, and how eye shapes present endless possibilities. Use reference images extensively, not just to copy, but to analyze how these anatomical principles manifest in real individuals. Pay close attention to the subtle curves, angles, and planes that define each feature. By internalizing these anatomical truths, you move beyond mere copying to truly understanding and constructing a face that feels solid and alive. This fundamental anatomical knowledge is the bedrock upon which all subsequent realistic drawing techniques are built, allowing you to confidently tackle any face you wish to render. For more general drawing advice, explore resources on drawing fundamentals.

Mastering Light, Shadow, and Form in Portraiture

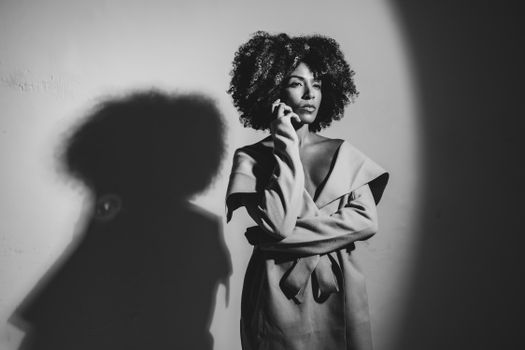
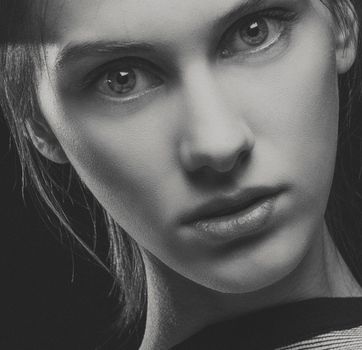
Once you grasp the underlying structure of the face, the next crucial step in how to draw realistic portraits is mastering the interplay of light, shadow, and form. This is where a two-dimensional drawing truly begins to take on three-dimensional life. Without proper rendering of values (the lightness or darkness of a tone), a portrait will appear flat and unconvincing. Start by understanding the basic principles of light: light source, highlights, mid-tones, core shadow, reflected light, and cast shadow. Each of these elements contributes to defining the form of the face. The light source dictates where highlights fall and where shadows are deepest. Highlights are the brightest points where light directly hits the surface, often seen on the forehead, nose bridge, cheekbones, and lips. Mid-tones represent the general local color of the skin, neither in direct light nor deep shadow. The core shadow is the darkest part of the form, where light cannot reach, and it helps turn the form away from the light source. Reflected light, often overlooked by beginners, is light bouncing off surrounding surfaces (like a shirt or wall) back into the shadowed areas, preventing them from becoming completely black and adding subtle depth. Cast shadows are created when one part of the face blocks light from another, such as the shadow cast by the nose onto the upper lip or cheek. Practice rendering simple geometric forms like spheres, cubes, and cylinders under various lighting conditions. This foundational exercise will train your eye to see value shifts and understand how light behaves on curved and angular surfaces. Then, apply this understanding to the complex forms of the face. For instance, the forehead isn't a flat plane but a curved surface; observe how the values subtly shift as it recedes from the light. The cheeks are complex curves, and the nose is a combination of planes and angles. Layering and blending are paramount for achieving smooth, realistic transitions in skin tones. Avoid drawing harsh outlines for shadows; instead, build them up gradually using multiple layers of pencil strokes. Start with lighter pressure and slowly increase it, or use softer lead pencils for darker areas. Blending tools like tortillons, stumps, or even cotton swabs can help create seamless gradients, but use them judiciously to avoid over-blending and losing texture. The goal is to create a sense of volume and depth, making the face appear to emerge from the paper. Experiment with different pencil grades (from 2H for light tones to 6B or 8B for deep shadows) to expand your tonal range and create compelling, lifelike contrasts.

Adding Character: Eyes, Nose, Mouth, and Hair Details

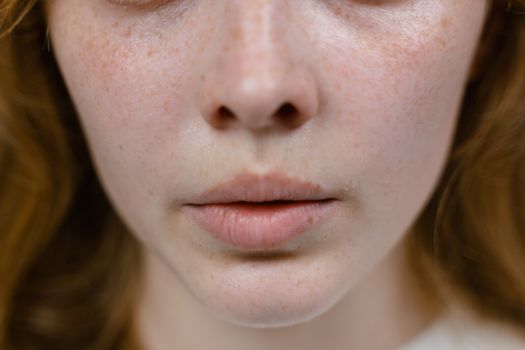
With a solid grasp of anatomy and value, the next step in how to draw realistic portraits is to infuse your work with character through meticulous detailing of the eyes, nose, mouth, and hair. These features are not just anatomical components; they are the windows to the soul and the primary carriers of individual identity and expression. **The Eyes:** Often considered the most expressive feature, eyes require careful attention. Start by accurately placing the eye sockets within the skull. Remember that the eyeball is a sphere nestled within these sockets, not a flat almond shape on the surface. Draw the eyelids as they wrap around this sphere, showing their thickness. The iris should be a perfect circle (though often partially covered by the eyelids), and the pupil a smaller, darker circle within it. Crucially, pay attention to the reflections (catchlights) in the eyes – these tiny bright spots bring the eyes to life and indicate the light source. Don't forget the subtle folds and wrinkles around the eyes, which add age and character. The eyelashes should be drawn as individual strands, curving outwards, not as a solid fringe. **The Nose:** The nose is a complex structure of cartilage and bone. Instead of drawing an outline, focus on rendering its planes and curves using values. Break it down into simpler forms initially – a central plane for the bridge, two side planes, and a ball for the tip. Observe how light and shadow define its unique shape. The nostrils are not just holes; they have distinct shapes and thickness. The philtrum, the vertical groove between the nose and upper lip, is a subtle yet important detail. **The Mouth:** The mouth is incredibly expressive. Start by establishing the overall width and placement. The lips are not flat; they have volume and distinct curves. The upper lip generally casts a slight shadow on the lower lip, and the corners of the mouth can create subtle creases. Pay attention to the Cupid's bow on the upper lip and the distinct line where the lips meet. When drawing teeth, avoid drawing every single tooth with an outline; instead, suggest them through subtle value changes and shadows, especially in the corners of the mouth. **The Hair:** Hair can be daunting, but the key is to avoid drawing individual strands everywhere. Instead, focus on drawing it in masses, observing how light hits the main forms of the hairstyle. Identify the direction of growth, the major clumps, and the areas of highlight and shadow within those clumps. Then, add a few individual strands on the edges or in highlighted areas to suggest texture and movement. Understanding the different types of hair – straight, wavy, curly – and how they reflect light differently will greatly enhance realism. Remember that hair has volume and doesn't just sit flat on the head; it lifts and flows. For more general drawing tips, consider improving your fundamental art skills.

Common Mistakes and Advanced Tips for Lifelike Portraits

Even with a solid foundation, aspiring artists often encounter pitfalls when learning how to draw realistic portraits. Being aware of these common mistakes can significantly accelerate your learning curve. One of the most frequent errors is drawing features in isolation without considering their relationship to the whole face. For example, drawing a perfect eye that doesn't quite fit the head's angle or proportion. Always step back and view the entire portrait, checking proportions and alignment frequently. Another common mistake is over-blending, which can make skin look waxy and lose its natural texture. Use blending sparingly and intentionally, allowing some pencil strokes to remain for added depth and realism. Many beginners also tend to draw outlines too heavily, especially for features like the nose or jawline. Remember that in reality, there are no hard outlines on the face; forms are defined by shifts in value. Focus on rendering values to create edges rather than drawing lines. Similarly, avoiding the full range of values – not going dark enough in shadows or light enough in highlights – results in a flat, undramatic portrait. Push your values to create strong contrast and a sense of depth. Here are some advanced tips to elevate your realistic portraits: * **Use a Grid or Sight-Size Method:** For beginners, a grid method can be invaluable for accurately transferring proportions from a reference photo. As you advance, try the sight-size method to train your eye to compare proportions more intuitively. * **Embrace Imperfections:** Real faces are not perfectly symmetrical. Including subtle asymmetries and unique characteristics (like a small mole, a slightly crooked nose, or uneven brows) will make your portrait far more lifelike and engaging. * **Focus on Edges:** Varying the sharpness and softness of edges is crucial. Sharp edges draw the eye, while soft edges help forms recede or blend. For instance, the edge of a highlight on the nose might be sharp, while the edge of a shadow under the chin might be soft. * **Background Matters:** Don't neglect the background. Even a simple, subtly shaded background can help ground your portrait and make the subject pop. Ensure the background values complement, rather than compete with, the subject. * **Practice Gesture Drawing:** While not directly portraiture, gesture drawing improves your ability to capture movement and life, which can subtly inform the dynamism of your portraits, even if the subject is still. * **Study Old Masters:** Analyze how artists like Rembrandt, Sargent, and Ingres handled light, form, and character. Their techniques offer timeless lessons in realistic portraiture. By consciously avoiding these common pitfalls and integrating these advanced tips, you'll find your realistic portraits gaining an incredible level of depth, character, and undeniable realism. The journey is continuous, so keep observing, practicing, and refining your approach.

Comparison

FeatureBest Option (Graphite)Alternative 1 (Charcoal)Alternative 2 (Colored Pencils)
Ease of BlendingExcellent, smoothGood, but can be messyModerate, requires layering
Detail CapabilityVery HighModerate to HighHigh
Value RangeWide (light to dark)Extremely Wide (deep blacks)Medium (limited darks)
ErasabilityGood (kneaded eraser)Poor (stains paper)Moderate
Required SkillsPrecision, value controlValue control, expressiveColor theory, layering

What Readers Say

"This guide completely demystified how to draw realistic portraits for me. The section on facial anatomy was a game-changer, and my proportions improved dramatically after just a few practice sessions."

Sarah J. · Austin, TX

"I used to struggle with flat-looking portraits, but the detailed explanation of light and shadow in this article helped me achieve incredible depth. My friends are amazed at the realism in my latest pieces."

Mark D. · Seattle, WA

"Following these steps, I went from drawing cartoonish faces to creating a lifelike portrait of my grandmother that brought tears to her eyes. The tips on rendering eyes and hair were particularly helpful."

Emily R. · Boston, MA

"The content is incredibly thorough, though some parts required re-reading for a beginner like me. Still, the amount of actionable advice on how to draw realistic portraits is unparalleled and has significantly boosted my skills."

David L. · Denver, CO

"As a digital artist looking to improve my foundational skills, this guide on realistic portrait drawing was perfect. The principles of light and form translate beautifully to digital mediums, enhancing my workflow."

Jessica M. · Orlando, FL

Frequently Asked Questions

What are the most crucial materials for how to draw realistic portraits?

For realistic portraits, essential materials include a range of graphite pencils (2H to 8B), smooth drawing paper (like Bristol board or Strathmore 300 Series), a kneaded eraser, a vinyl eraser, and blending tools such as tortillons or cotton swabs. Quality materials provide better control and smoother results.

Is it possible to learn how to draw realistic portraits without formal training?

Absolutely! Many self-taught artists excel at realistic portraiture. This guide, combined with consistent practice, studying reference photos, analyzing master artworks, and utilizing online tutorials, can provide a comprehensive learning path without needing formal education.

How do I make skin tones look smooth and realistic?

To achieve smooth skin tones, use a layering technique. Start with light pressure and gradually build up values, using multiple layers of soft graphite. Employ blending tools like tortillons or soft brushes to gently smooth transitions, but avoid over-blending, which can make the skin look flat. Observing subtle color variations in reference photos also helps.

How much does it cost to get started with realistic portrait drawing?

Getting started can be quite affordable. A basic set of quality graphite pencils, a sketchbook, and erasers might cost around $20-$50. As you progress, you might invest in higher-grade papers, more specialized blending tools, or charcoal/colored pencils, which can increase the cost, but the initial investment is minimal.

How does drawing realistic portraits compare to stylized portraiture?

Realistic portraiture focuses on accurately depicting the subject's appearance, proportions, and textures as they are in reality. Stylized portraiture, conversely, involves artistic interpretation, exaggeration, or simplification of features to convey a particular aesthetic or mood, often prioritizing expression over strict accuracy. Both require skill, but the approach differs significantly.

Who should attempt to learn how to draw realistic portraits?

Anyone with a passion for art and a desire to capture the human form accurately can learn realistic portraiture. It's particularly rewarding for those who enjoy detailed observation, patience, and the challenge of translating three-dimensional reality onto a two-dimensional surface. It's suitable for both beginners and experienced artists looking to refine their skills.

Are there any risks of eye strain or physical discomfort when drawing for long periods?

Yes, drawing for extended periods can lead to eye strain, neck pain, or wrist discomfort. It's crucial to take regular breaks, maintain good posture, ensure adequate lighting, and use an ergonomic setup. Stretching exercises for hands, wrists, and neck can also help prevent discomfort and injury.

What is the future trend for realistic portrait drawing in the digital age?

Realistic portrait drawing continues to thrive, with digital tools offering new avenues for expression and efficiency. Digital painting and drawing software allow for precise layering, blending, and texture application, mimicking traditional techniques while offering undo functions and vast color palettes. The trend is toward a hybrid approach, where traditional skills inform digital artistry, allowing artists to explore both realms seamlessly.

Mastering how to draw realistic portraits is a rewarding journey that blends technical skill with artistic vision. By diligently applying the principles outlined in this guide, you can unlock your potential to create stunning, lifelike artworks. Start practicing today and witness your artistic evolution.

Topics: how to draw realistic portraitsportrait drawing techniquesrealistic art materialsfacial anatomy drawingshading realistic portraits
Leo List
Brampton weed
Adultwork EstrelaBet Vai de Bet R7 Bet Betão Galera Bet Rainbet Bet9ja Shop SportyBet BetKing Sisal Loto Foot Hollywoodbets YesPlay Odibets RushBet Jugabet BetWarrior BetCity MSport betPawa Fortebet