How to Clean Oil Paintings at Home Safely
how to clean oil paintings at home

How to Clean Oil Paintings at Home Safely

Discover professional techniques to safely clean and preserve your treasured oil paintings from the comfort of your home.

Start Cleaning Now

Key Takeaways

  • ✓ Always test cleaning solutions on an inconspicuous area first.
  • ✓ Water and mild soap are often sufficient for surface dirt.
  • ✓ Avoid harsh chemicals, solvents, or abrasive materials.
  • ✓ Consult a professional conservator for valuable or severely damaged paintings.
  • ✓ Dust regularly with a soft, dry brush to prevent buildup.

How It Works

1
Assess the Painting's Condition

Before starting, carefully examine your oil painting for any cracks, flaking paint, or signs of damage. This initial assessment helps determine the appropriate cleaning method and identifies areas requiring extra caution.

2
Dust Gently and Thoroughly

Begin by removing loose dust and cobwebs from the surface using a very soft, clean brush (like a cosmetic brush) or a microfiber cloth. Always brush in one direction and avoid pressing too hard on the canvas.

3
Perform a Spot Test

Regardless of the cleaning solution you choose, always apply a tiny amount to a small, hidden area of the painting first. Wait a few minutes to ensure there's no adverse reaction, such as paint lifting or discoloration, before proceeding.

4
Clean with Care and Patience

Using your chosen gentle cleaning method, work in small sections, applying minimal pressure. Use clean, soft cloths or cotton swabs, changing them frequently to avoid redepositing dirt. Patience is key to preventing damage.

Understanding Your Oil Painting: A Foundation for Safe Cleaning

Vibrant paint palette with brush and tubes in an artist's studio setting. 
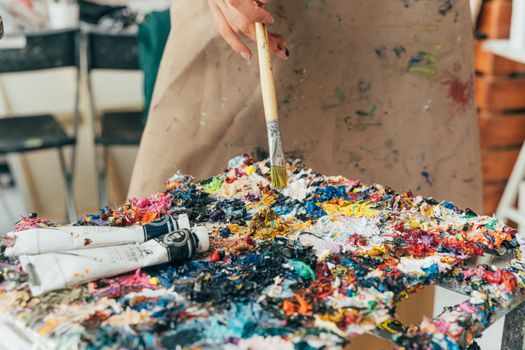
Photo: AI25.Studio Studio / Pexels
Before you even think about touching your cherished oil painting with a cleaning solution, it's crucial to understand what you're working with. Oil paintings are complex artworks, typically consisting of layers: a support (canvas, wood panel, etc.), a ground layer, multiple layers of oil paint, and often a varnish layer. Each of these components can react differently to cleaning agents, and an incorrect approach can lead to irreversible damage. The age of the painting, the type of oil paints used, and the presence and condition of a varnish layer are all critical factors. Older paintings, especially those from before the 20th century, often have more delicate paint layers and may be covered with natural resin varnishes that yellow and become brittle over time. These varnishes, while intended to protect, can also trap dirt and become discolored, obscuring the original vibrancy of the artwork. Modern oil paintings, while generally more robust, can still be susceptible to damage if cleaned improperly. Flaking paint, cracks, or areas where the canvas is loose are red flags that indicate a need for extreme caution or, ideally, professional intervention. Attempting to clean a painting with structural issues can exacerbate the problem, causing paint loss or further deterioration. Always examine your painting under good lighting, looking for any signs of instability before proceeding. Remember, the goal of cleaning is not just to remove dirt but to do so without compromising the integrity or artistic intent of the piece. This foundational understanding will guide your decisions and prevent common mistakes when you embark on the journey of restoring your art's brilliance. Prioritizing preservation over aggressive cleaning is always the wisest course of action for any artwork, especially those with sentimental or monetary value. If you're unsure about any aspect of your painting's construction or condition, it's always safer to err on the side of caution and seek expert advice. This initial assessment phase is perhaps the most critical step in successfully learning how to clean oil paintings at home, as it sets the stage for all subsequent actions and determines the appropriate level of intervention. Neglecting this step can lead to regrettable outcomes, transforming a simple cleaning task into a costly restoration project.

Gathering Your Tools: Essential Supplies for Gentle Cleaning

A variety of paintbrushes in different sizes against a clean white background, perfect for artistic themes. 
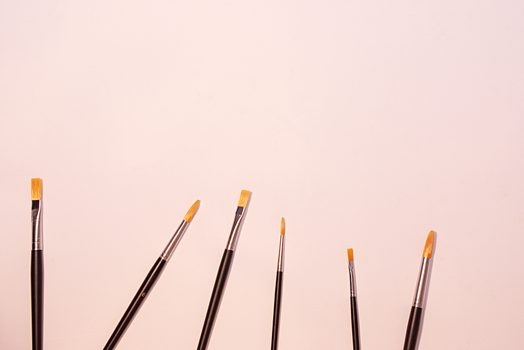
Photo: Diana ✨ / Pexels
Once you've assessed your painting and determined it's suitable for home cleaning, assembling the right toolkit is your next step. The key here is 'gentle' – every item should be non-abrasive and designed to treat delicate surfaces with care. First and foremost, you'll need a selection of very soft brushes. A large, clean cosmetic brush (like a blush brush) or a soft, natural hair artist's brush is ideal for dusting. These brushes are gentle enough to dislodge surface dust without scratching or abrading the paint or varnish layer. Avoid stiff-bristled brushes at all costs. Next, you'll need plenty of clean, lint-free cloths. Microfiber cloths are excellent as they trap dust effectively and are very soft. Alternatively, soft cotton cloths, like old t-shirts or handkerchiefs, can work, but ensure they are thoroughly washed and free of any fabric softeners or dyes that could transfer. For more precise cleaning and spot treatment, cotton swabs (Q-tips) are indispensable. They allow you to work in small, controlled areas and can be easily discarded once soiled, preventing the spread of dirt. When it comes to cleaning solutions, less is often more. Distilled water is a safe starting point for general surface grime. It's free of minerals and impurities found in tap water that could leave residues. For slightly more stubborn dirt, a very mild, pH-neutral soap (like Ivory soap flakes or a specialized art cleaner) diluted heavily in distilled water can be considered, but only after careful spot testing. Never use household detergents, harsh chemicals, or solvents like turpentine, mineral spirits, or alcohol, as these can strip paint, dissolve varnish, or cause irreparable damage. You'll also need a clean, flat surface to work on, good lighting, and possibly a magnifying glass for close inspection. Always have a second, dry cloth or cotton swab handy to gently blot away excess moisture immediately after cleaning. A small, clean container for your cleaning solution and another for rinse water (if using) will complete your setup. Remember, cleanliness of your tools is paramount; a dirty brush or cloth can transfer grime back onto the painting or scratch its surface. By carefully selecting and preparing your supplies, you're setting yourself up for a successful and safe cleaning process, ensuring the longevity and beauty of your artwork. This meticulous preparation is a hallmark of professional art care, adapted for the home environment, emphasizing prevention over intervention.

Step-by-Step Guide: Safely Cleaning Surface Dirt and Grime

With your tools ready and your painting assessed, you can now proceed with the actual cleaning. This process requires patience, a light touch, and adherence to specific steps to ensure the safety of your artwork. Begin by placing your painting on a clean, stable surface, ensuring it is well-supported. Adequate lighting is crucial to see what you're doing and identify any changes. **Step 1: Initial Dry Dusting.** Using your soft, clean brush, gently sweep away any loose dust, cobwebs, or debris from the entire surface of the painting. Work in small sections, always brushing in one direction, typically from top to bottom. Avoid pressing down or scrubbing. The goal here is just to remove superficial particles without touching the paint layer. For textured areas, use a very light dabbing motion with the brush. If the painting is heavily textured, a soft artist's sable brush can reach into crevices more effectively than a wider cosmetic brush. **Step 2: Preparing Your Gentle Cleaning Solution.** If dry dusting isn't enough, prepare a solution of distilled water. For slightly more stubborn dirt, you can add a tiny drop of pH-neutral soap (like conservation-grade art cleaner or pure Ivory soap flakes dissolved in water) to a small bowl of distilled water. The dilution should be extremely high – think one drop of soap per cup of water. Stir well to ensure the soap is fully dispersed. **Step 3: The Crucial Spot Test.** This step cannot be overstressed. Dip a clean cotton swab into your prepared solution, then gently blot it on a paper towel to remove excess moisture. Find an inconspicuous area on the painting – perhaps a dark edge that will not be easily noticed, or a part of the canvas covered by the frame. Gently roll the damp cotton swab over a tiny spot. Observe for any color transfer onto the swab, stickiness, or softening of the paint. Wait a few minutes. If the paint shows any sign of coming off or changing, stop immediately. Your painting may be too delicate for this method, or it might have an unvarnished surface that is not suitable for moisture. If the test area remains stable, you can proceed. **Step 4: Gentle Surface Cleaning.** Using fresh cotton swabs, lightly dampened with your tested solution (again, blot off excess), begin cleaning a small section of the painting. Work in small, circular motions or gentle strokes, constantly rotating the swab to expose a clean surface. As the swab picks up dirt, discard it and use a fresh one. This prevents redepositing grime. Never rub aggressively. The goal is to lift dirt, not scrub it off. For larger areas, you can use a slightly damp, lint-free microfiber cloth, but always maintain a very light touch. **Step 5: Rinsing (if using soap).** If you used a soapy solution, you'll need to gently rinse the area. Use a fresh cotton swab dampened *only* with distilled water (no soap), and lightly go over the cleaned area to remove any soap residue. This is critical as soap residue can attract new dirt or become sticky over time. **Step 6: Drying.** Immediately after cleaning and rinsing a section, gently blot the area dry with a clean, soft, dry cloth or cotton swab. Do not allow water to sit on the surface. Allow the painting to air dry completely in a dust-free environment before handling it further or returning it to its display location. By following these steps meticulously, you are employing a method that respects the delicate nature of oil paint and varnish layers, making it possible to safely clean oil paintings at home and significantly improve their appearance without causing harm. Remember, patience and a conservative approach are your best allies in this process, ensuring your artwork is preserved for years to come. Proper art care is an investment in history and beauty.

Advanced Tips and Common Mistakes to Avoid When Cleaning Oil Paintings

Once you've mastered the basics of how to clean oil paintings at home, there are several advanced tips that can further enhance your success and common pitfalls you absolutely must avoid. **Advanced Tips:** * **Consider a Humidifier for Dry Cracks:** If your painting has fine cracks (craquelure) that appear dry, sometimes a slight increase in humidity in the room for a short period can help the paint layers become more pliable, reducing the risk of further flaking during cleaning. However, this is a delicate balance; too much humidity can encourage mold growth. Use a hygrometer to monitor. * **Specialized Art Cleaning Sponges:** For very light surface dust that adheres more stubbornly, some conservators use specialized 'smoke sponges' or dry cleaning sponges. These are non-abrasive, chemically inert sponges that can lift dirt without moisture. Always test in an inconspicuous area first. * **Understanding Varnish Layers:** If your painting has a discolored varnish layer that is significantly obscuring the artwork, and you are confident it's a natural resin varnish (like dammar or mastic), very gentle cleaning might improve clarity. However, varnish removal is a highly specialized task best left to professional conservators, as incorrect solvents or techniques can strip paint layers. * **Consistent Environment:** After cleaning, maintain a stable environment for your painting. Avoid extreme temperature fluctuations, direct sunlight, or high humidity, which can all contribute to future deterioration and dirt accumulation. **Common Mistakes to Avoid:** * **Using Saliva:** While some conservators use saliva for localized spot cleaning due to its enzymatic properties, it's not recommended for widespread home use. It's difficult to control, can introduce bacteria, and is generally less effective than distilled water for general grime. * **Rubbing Too Hard:** This is perhaps the most common and damaging mistake. Aggressive rubbing can abrade the paint surface, remove delicate glazes, or even lift paint, especially on older or fragile artworks. Always use a light, rolling, or dabbing motion. * **Ignoring the Spot Test:** Skipping the spot test is a gamble that rarely pays off. It's your only safeguard against damaging an entire painting with an unsuitable cleaning method or solution. * **Using Household Cleaners:** Products like Windex, furniture polish, dish soap, or all-purpose cleaners contain chemicals, abrasives, and often ammonia or alcohol. These are designed for hard, non-porous surfaces, not delicate oil paint, and will almost certainly cause damage. * **Over-Wetting the Canvas:** Excessive moisture can cause swelling of the canvas, lead to mold, or even loosen paint. Cotton swabs should be damp, not dripping, and cloths should be wrung out thoroughly. * **Cleaning Unvarnished Paintings with Moisture:** If your painting is unvarnished, the oil paint surface is directly exposed. Using water or any liquid cleaner on an unvarnished painting can soften the paint, cause blooming, or even lift pigments. Unvarnished paintings should primarily be dry-dusted. If they require more, consult a professional. * **Applying Pressure to Flaking Paint:** Never apply pressure to areas where paint is flaking or lifting. This will only cause more paint loss. These areas require consolidation by a professional conservator before any cleaning can occur. By being aware of these advanced considerations and diligently avoiding common mistakes, you can significantly enhance your ability to safely and effectively care for your oil paintings at home, ensuring their beauty endures for generations.

Comparison

FeatureDIY Gentle CleaningProfessional ConservationHousehold Cleaners
CostLow (supplies)High (specialized service)Low (on hand)
Safety for ArtHigh (if done correctly)Highest (expert knowledge)Very Low (high risk)
Effectiveness for Surface DirtGoodExcellent (includes varnish removal)Variable, high risk of damage
Suitable for Flaking Paint✓ (consolidation required)
Tools RequiredSoft brushes, cotton swabs, distilled waterSpecialized solvents, tools, expertiseWindex, dish soap, harsh cloths
Risk of DamageModerate (if careless)Minimal (expert hands)Extremely High

What Readers Say

"This guide on how to clean oil paintings at home was a lifesaver! My grandmother's painting had years of dust and grime, and using the gentle distilled water method brought back its original colors without any damage. I followed every step meticulously, especially the spot test."

Sarah J. · Austin, TX

"I was nervous about touching my antique oil painting, but this article provided clear, actionable advice. The emphasis on soft brushes and cotton swabs for cleaning really made a difference. It looks so much brighter now!"

Mark D. · Seattle, WA

"The detailed instructions on how to clean oil paintings at home helped me restore a small landscape painting that was almost unrecognizable. The crucial spot test saved me from making a mistake with another, more delicate piece. The colors are vibrant again!"

Emily R. · Miami, FL

"Good information, especially the warnings about what NOT to use. I cleaned a modern oil painting successfully. For my older, more valuable piece, I still plan to consult a professional, as the article wisely suggested for complex cases."

David L. · Denver, CO

"As an amateur artist, I appreciated the breakdown of the painting's layers and the importance of gentle tools. I cleaned some of my own older works and the results were fantastic. It's empowering to know how to clean oil paintings at home safely."

Jessica M. · Chicago, IL

Frequently Asked Questions

What's the safest way to clean an oil painting at home?

The safest way involves dry dusting with a very soft brush, followed by a gentle wipe with a cotton swab or microfiber cloth dampened with distilled water. Always perform a spot test on an inconspicuous area first to ensure no paint lifting or discoloration occurs. Patience and a light touch are paramount.

Can I use household cleaners like Windex or soap on an oil painting?

Absolutely not. Household cleaners contain harsh chemicals, ammonia, or abrasives that can irreparably damage oil paint, dissolve varnish, or cause discoloration. Stick to distilled water or very mild, pH-neutral solutions specifically designed for art, and only after a successful spot test.

How do I remove yellowed varnish from an oil painting?

Removing yellowed varnish is a highly specialized process that should almost always be left to a professional conservator. It involves specific solvents and techniques that, if misused, can strip the paint layers underneath. Attempting this at home carries a very high risk of permanent damage to your artwork.

Is it expensive to have an oil painting professionally cleaned?

Professional cleaning costs can vary widely depending on the size of the painting, the extent of the damage, and the complexity of the cleaning required (e.g., surface dirt vs. varnish removal or structural repair). While it can be an investment, for valuable or sentimental pieces, it often outweighs the risk of irreversible damage from DIY attempts.

What's the difference between cleaning a varnished and unvarnished oil painting?

Varnished paintings have a protective top layer that can typically withstand gentle moisture cleaning (like distilled water) to remove surface dirt. Unvarnished paintings have exposed paint layers that are much more susceptible to damage from moisture; they should primarily be dry-dusted, and any wet cleaning should be approached with extreme caution or by a professional.

Who should attempt to clean oil paintings at home?

Individuals with paintings that have only superficial dust and grime, no flaking paint, cracks, or significant discoloration of the varnish layer, and who are willing to proceed with extreme caution, patience, and adherence to safe methods. For valuable, antique, or damaged pieces, professional help is always recommended.

What are the biggest risks of cleaning an oil painting incorrectly?

The biggest risks include paint loss, abrasion of the paint surface, discoloration, softening of paint layers, introduction of moisture-related damage (like mold), and irreversible changes to the artwork's original appearance or integrity. These damages are often permanent and can significantly reduce the painting's value.

Are there any new technologies or methods for cleaning oil paintings?

While traditional conservation methods remain the gold standard, research continues into new, gentler cleaning agents like gels and emulsions that allow for more controlled application and reduced solvent exposure. However, these are typically used by trained conservators in controlled environments, not for home application.

Empower yourself with the knowledge to safely care for your cherished artworks. By understanding how to clean oil paintings at home, you can preserve their beauty and history for generations. Always proceed with caution, and when in doubt, consult a professional conservator to ensure the longevity of your treasured pieces.

Topics: how to clean oil paintings at homeoil painting restorationart cleaning tipscanvas cleaningconserving oil paintings
Leo List
Brampton weed
Adultwork