Mastering Oil: Essential Art Supplies for Oil Painting Kit

A collection of vibrant acrylic paint tubes and brushes on an art studio desk.Photo: RDNE Stock project / Pexels

Mastering Oil: Essential Art Supplies for Oil Painting Kit

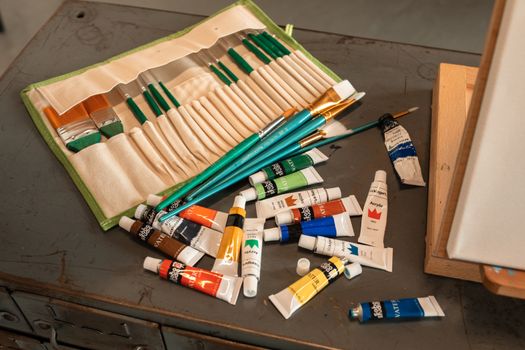
Equip yourself with the perfect tools to embark on your oil painting journey and create captivating masterpieces.

Start Painting Now

Key Takeaways

  • ✓ Oil painting allows for rich color, blendability, and a unique textural quality.
  • ✓ A quality starter kit includes paints, brushes, solvents, and a palette.
  • ✓ Understanding paint types (student vs. artist grade) is crucial for results and budget.
  • ✓ Proper ventilation and safety practices are paramount when working with oil paints and solvents.

How It Works

1
Gather Your Core Paints

Select a foundational set of oil paints, focusing on primary colors plus white and black. This allows for extensive color mixing and understanding color theory basics.

2
Choose the Right Brushes

Acquire a variety of brush shapes and sizes, specifically designed for oil painting. Different brushes create different strokes and textures, essential for diverse applications.

3
Prepare Your Workspace

Set up a well-ventilated area with a suitable easel, palette, and cleaning supplies. A clean and organized space enhances focus and prevents accidental spills or damage.

4
Begin Your First Painting

Start with simple subjects to familiarize yourself with the medium's properties. Experiment with layering, blending, and drying times to build confidence and skill.

Understanding the Foundation: Essential Oil Paints

Embarking on the journey of oil painting is an exciting endeavor, and the very first step is understanding the heart of your craft: the oil paints themselves. Not all oil paints are created equal, and knowing the distinctions will profoundly impact your artistic output, your budget, and your overall experience. Generally, oil paints are categorized into two main grades: student grade and artist grade. Student-grade paints, as the name suggests, are formulated with beginners and students in mind. They often contain less pigment and more filler, making them more affordable. While this can be a great entry point, allowing you to experiment without significant financial commitment, it's important to recognize their limitations. The colors might be less vibrant, the consistency can be thinner, and their lightfastness (resistance to fading over time) may not be as high as professional-grade paints. For those just starting to explore painting techniques, a student set provides an excellent opportunity to learn color mixing, brush handling, and the unique properties of oil without breaking the bank. Artist-grade, or professional-grade, oil paints, on the other hand, boast a higher concentration of pure pigment, resulting in richer, more intense colors with superior lightfastness. They typically have a smoother, more buttery consistency, which translates to better coverage and more satisfying application. While significantly more expensive, the investment in artist-grade paints is often justified by their archival quality and the sheer brilliance they bring to a finished piece. Many professional artists will tell you that the difference in vibrancy and workability is palpable. Beyond grade, consider the actual pigments. A basic starter palette should include a selection of primary colors (red, yellow, blue), plus white and black. From these, you can mix an astonishing array of secondary and tertiary colors. Common recommendations include Cadmium Red, Cadmium Yellow, Ultramarine Blue, Titanium White, and Ivory Black. Earth tones like Burnt Umber or Yellow Ochre are also incredibly versatile. When choosing brands, research their reputation for pigment quality, consistency, and lightfastness ratings. Some brands offer unique formulations, like fast-drying oils or water-mixable oils, which can be advantageous depending on your specific needs and preferences. Remember, the quality of your paints directly correlates with the longevity and visual impact of your artwork, making this a crucial decision for any aspiring oil painter. Don't be afraid to start small and gradually expand your palette as your skills and understanding grow.

The Artist's Hand: Essential Brushes and Tools

Once you have your paints, the next vital component of your art supplies for oil painting kit is your arsenal of brushes and other essential tools. Brushes are an extension of the artist's hand, translating intention onto the canvas, and selecting the right ones can dramatically influence your painting style and results. Oil painting brushes come in a variety of shapes, sizes, and hair types, each designed for specific purposes. For oil paints, generally, brushes with stiffer bristles are preferred, as they can handle the thicker consistency of the paint. Hog bristle brushes are a classic choice, known for their springiness and ability to hold a good amount of paint. They're excellent for creating impasto textures and bold strokes. Synthetic brushes, often made from nylon or polyester, are another popular option. They are durable, easy to clean, and can mimic natural hairs, offering a good balance of stiffness and softness. Softer brushes, like sable or synthetic blends, are better suited for smooth blending, glazing, and intricate details. In terms of shapes, a well-rounded kit should include: flats (for broad strokes and crisp edges), rounds (for fine lines and details), filberts (a versatile shape that combines aspects of flats and rounds, great for blending), and perhaps a fan brush (excellent for softening edges and creating textural effects like foliage). Start with a selection of small, medium, and large brushes in a few key shapes to cover most painting needs. You don't need dozens of brushes right away; a carefully chosen set of 5-7 quality brushes can take you far. Beyond brushes, several other tools are indispensable. A palette is crucial for mixing colors. Traditional wooden palettes are beautiful but absorb oil, requiring conditioning. Glass or ceramic palettes are easy to clean and non-absorbent. Disposable paper palettes offer convenience. Palette knives are not just for mixing paint; they can also be used to apply paint directly to the canvas, creating unique textures and effects that brushes cannot achieve. A sturdy easel, whether a tabletop or a standing studio model, is essential for comfortable painting, allowing you to view your work from an optimal angle. Finally, don't forget cleaning supplies. Odorless mineral spirits or turpentine are commonly used for thinning paints and cleaning brushes. Have separate containers for cleaning and rinsing. A good quality brush cleaner or soap will help preserve your brushes' life. Rags or paper towels are also a must-have for wiping brushes and cleaning up spills. Investing in quality tools will not only make your painting experience more enjoyable but will also contribute to the longevity of your supplies and the quality of your artwork.

Creating Your Canvas: Supports, Mediums, and Solvents

With paints and brushes in hand, the next critical elements of your art supplies for oil painting kit are the surfaces you paint on, the mediums that modify your paint, and the solvents that help clean and thin them. Each plays a pivotal role in the painting process and the final appearance of your artwork. The most common support for oil painting is canvas, typically made from cotton or linen. Cotton canvas is more affordable and widely available, making it an excellent choice for beginners and practice pieces. Linen canvas, while more expensive, offers a finer weave, greater durability, and a luxurious feel that many professional artists prefer. Both types come stretched on wooden frames or as unstretched rolls, allowing you to prepare them yourself. Regardless of material, it's crucial that your canvas is properly primed with gesso. Gesso creates a barrier between the oil paint and the canvas fibers, preventing the oil from deteriorating the fabric over time and providing a consistent, slightly absorbent surface for the paint to adhere to. Without gesso, the oil will literally rot the canvas. Other supports include wood panels, which offer a rigid, smooth surface ideal for detailed work, and paper specially prepared for oils, which is a good option for studies and sketches due to its affordability and ease of storage. Mediums are substances added to oil paint to alter its properties – how it flows, dries, and shines. Linseed oil is the most traditional and widely used medium; it increases the paint's flow, gloss, and transparency, and slows drying time. Stand oil, a thicker version of linseed oil, creates a smoother, enamel-like finish. Walnut oil is another option, known for its non-yellowing properties. Alkyd mediums, like Liquin, are popular for their ability to significantly speed up drying time, allowing for faster layering and completion of paintings. They also increase flow and transparency. Understanding how different mediums affect your paint is key to achieving specific effects, from thin glazes to rich impasto. Experimentation is encouraged to find what works best for your style. Solvents are primarily used for thinning oil paints and cleaning brushes. Turpentine is a traditional solvent, effective but known for its strong odor and toxicity. Odorless mineral spirits (OMS) are a popular alternative, offering similar thinning and cleaning capabilities with significantly reduced fumes, making them safer for indoor use. However, even odorless solvents require good ventilation. Always dispose of solvent-soaked rags properly to prevent spontaneous combustion. Never pour solvents down the drain; consult your local waste management for proper disposal methods. Some artists opt for solvent-free painting by using specific mediums or oils for thinning and dedicated brush cleaners, which is an excellent option for those with sensitivities or environmental concerns. The careful selection and use of supports, mediums, and solvents are fundamental to a successful and enjoyable oil painting practice, ensuring the longevity and brilliance of your finished art creations.

Advanced Tips and Common Mistakes to Avoid in Oil Painting

As you delve deeper into oil painting, understanding advanced techniques and avoiding common pitfalls can significantly accelerate your learning curve and improve your artistic outcomes. Many beginners make similar mistakes, but with a bit of foresight, you can sidestep them. One of the most crucial principles in oil painting is 'fat over lean.' This rule dictates that each subsequent layer of paint should contain more oil (be 'fatter') than the layer beneath it (the 'leaner' layer). Ignoring this can lead to cracking as the painting dries, because leaner layers dry faster and more rigidly than fatter ones. Start with thin, turpentine-thinned layers, and gradually introduce more oil or alkyd medium in subsequent layers. Another common mistake is inadequate ventilation. Oil paints and their associated solvents release fumes that can be harmful if inhaled over prolonged periods. Always work in a well-ventilated area, preferably with an open window or an air purifier. Consider using odorless mineral spirits (OMS) instead of turpentine to reduce fume exposure, but even then, ventilation is key. Don't be afraid of color mixing. Many beginners stick to colors straight from the tube. The true magic of oil painting lies in mixing your own hues. Invest time in creating color charts to understand how your paints interact. This will not only expand your palette but also give your paintings a unique, harmonious feel. Proper brush cleaning is often overlooked. Leaving paint to dry in your brushes will ruin them quickly. Clean your brushes thoroughly with solvent immediately after each painting session, then wash them with soap and water. Reshape them and let them dry flat or brush-end up to prevent water from seeping into the ferrule. Finally, patience is a virtue in oil painting. Oil paints dry slowly, which is both a blessing (allowing for extended blending time) and a curse (requiring waiting between layers). Resist the urge to rush the drying process or apply thick, wet layers over wet ones without proper understanding. Embrace the slow pace; it's part of the medium's charm and allows for thoughtful development of your artwork. **Advanced Tips:** * **Glazing:** Apply thin, transparent layers of paint (often thinned with a lot of medium) over dried opaque layers to create luminous color shifts and depth. * **Impasto:** Use thick applications of paint, often directly from the tube or with a palette knife, to create textural effects and a three-dimensional quality. * **Underpainting:** Start with a monochrome or limited color underpainting to establish values and composition before adding full color. * **Varnishing:** Once completely dry (which can take 6-12 months), varnish your oil painting to protect it from dirt, UV light, and to unify the sheen. Choose between a glossy, satin, or matte finish. * **Learn from Masters:** Study the techniques of historical and contemporary oil painters. Analyze their brushwork, color choices, and compositions to inspire and inform your own practice.

Comparison

FeatureBest Option (Artist Grade)Alternative 1 (Student Grade)Alternative 2 (Water-Mixable Oil)
Pigment ConcentrationHigh, vibrant colorsModerate, less intenseHigh, vibrant colors
Drying TimeSlow (days to weeks)Slow (days to weeks)Faster (hours to days)
Blending CapabilityExcellent, long open timeGood, slightly less open timeExcellent
Solvent RequirementYes (OMS/Turpentine)Yes (OMS/Turpentine)No (Water cleanup)
Cost$$$$$$
LightfastnessExcellent archival qualityGood to ModerateExcellent archival quality
Ease of CleanupRequires solventsRequires solventsEasy with water
OdorModerate (with solvents)Moderate (with solvents)Low/None

What Our Readers Say

5 ★★★★★

"This guide to art supplies for oil painting kits was incredibly thorough! I finally understand the difference between student and artist-grade paints, which has made a huge difference in my artwork's vibrancy and texture. My paintings look so much more professional now."

5 ★★★★★

"As a beginner, I was overwhelmed by the sheer amount of oil painting supplies. This article broke down everything I needed in an easy-to-understand way. The tips on 'fat over lean' saved me from a lot of potential cracking issues, thank you!"

5 ★★★★★

"I followed the advice on building a core palette and selecting brushes, and my ability to mix colors has drastically improved. My recent landscape painting, using the suggested mediums, has a depth and luminosity I couldn't achieve before."

4 ★★★★☆

"The information on ventilation and proper solvent disposal was very helpful, something I hadn't considered enough. While the article is excellent, I wished for a few more specific brand recommendations for brushes, but overall, a fantastic resource."

5 ★★★★★

"I've been painting with acrylics for years and wanted to try oils. This guide was the perfect transition, clearly explaining the unique aspects of oil painting supplies, especially the nuances of drying times and layering. It made the switch feel much less daunting."

Frequently Asked Questions

What are the absolute must-have art supplies for an oil painting kit for a beginner?
For a beginner, the absolute must-haves include a basic set of student-grade oil paints (primary colors, white, black), a few synthetic or hog bristle brushes (a flat, a round, and a filbert in medium sizes), an odorless mineral spirit for thinning and cleaning, a palette, and a few pre-primed canvases or canvas boards.
Is oil painting too difficult for a complete beginner?
Oil painting can seem intimidating, but it's not too difficult for a complete beginner. Its slow drying time allows for extensive blending and corrections, which can actually be more forgiving than faster-drying mediums like acrylics. Starting with a good basic kit and simple exercises will help build confidence quickly.
How do I properly clean my oil painting brushes?
To properly clean oil painting brushes, first wipe off excess paint with a rag. Then, swirl the brush in a container of odorless mineral spirits (OMS) or turpentine to remove most of the paint. Finally, wash the brush with warm water and a specialized brush soap or mild dish soap until no paint residue remains. Reshape the bristles and let them dry flat or brush-end up.
How much should I expect to spend on a quality beginner oil painting kit?
A quality beginner oil painting kit can range from $50 to $150, depending on the brand and comprehensiveness. Student-grade paints and synthetic brushes will be on the lower end, while a slightly more robust selection with a small artist-grade set might push towards the higher end. It's an investment that pays off in creative expression.
What's the main difference between oil paints and acrylic paints?
The main difference lies in their drying time and binder. Oil paints use an oil binder (like linseed oil) and dry very slowly through oxidation, allowing for extended blending. Acrylic paints use an acrylic polymer emulsion binder and dry quickly through evaporation, making them less forgiving for blending but faster for layering.
Who should consider using water-mixable oil paints?
Water-mixable oil paints are an excellent choice for artists who are sensitive to solvents, work in spaces with poor ventilation, or prefer easier cleanup. They offer many of the benefits of traditional oils, like slow drying and rich color, but can be thinned and cleaned with water, eliminating the need for turpentine or mineral spirits.
Are there any safety concerns with using art supplies for oil painting?
Yes, there are safety concerns. Many oil painting solvents (turpentine, mineral spirits) emit fumes that require good ventilation to avoid respiratory issues. Some pigments can be toxic, so avoid ingesting paint or using your mouth to point brushes. Always read labels and work in a well-ventilated area, disposing of materials properly.
What future trends are emerging in oil painting supplies?
Future trends in oil painting supplies are leaning towards more eco-friendly and artist-health conscious options. This includes an increase in solvent-free mediums, non-toxic pigment alternatives, and advancements in water-mixable oil formulations that offer performance closer to traditional oils without the associated health and environmental concerns.

Equipping yourself with the right art supplies for an oil painting kit is the first brushstroke on your artistic journey. From understanding paints to mastering tools, this comprehensive guide empowers you to create with confidence and unlock the timeless beauty of oil painting. Start building your kit today and transform your creative visions into lasting masterpieces.

Topics: art supplies for oil painting kitoil painting essentialsbeginner oil paint setoil painting materialsprofessional oil art supplies
Leo List
Brampton weed
Adultwork