Essential Art Supplies for Oil Painting Beginners
art supplies for oil painting beginners

Essential Art Supplies for Oil Painting Beginners

Unlock your creative potential with the right tools, making your first oil painting experience enjoyable and rewarding.

Start Painting Now

Key Takeaways

  • ✓ Quality student-grade paints offer excellent value and performance for beginners.
  • ✓ Synthetic brushes are versatile and easier to clean than natural hair for oils.
  • ✓ Gesso-primed canvases or panels are ideal starting surfaces.
  • ✓ Odorless mineral spirits are a safer alternative to turpentine for cleaning.

How It Works

1
Gather Your Materials

Acquire a basic set of student-grade oil paints, a few essential brushes, a palette, and a suitable painting surface. Don't overspend; focus on quality basics.

2
Set Up Your Workspace

Ensure good ventilation, protect your surfaces with newspaper or a drop cloth, and have rags and solvent ready for cleaning. Organization is key for a smooth process.

3
Understand Basic Techniques

Familiarize yourself with paint consistency, color mixing, and the 'fat over lean' rule. Practice simple strokes and color blending before tackling complex subjects.

4
Start Painting!

Begin with a simple subject. Don't be afraid to experiment and make mistakes; learning is part of the artistic journey. Enjoy the tactile experience of oil paint.

Choosing Your First Oil Paints: A Beginner's Guide to Palettes
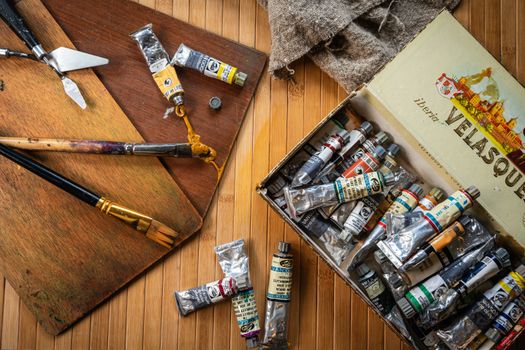
Artistic setup featuring various paint tubes, brushes, and tools on a wooden surface. Photo: Ylanite Koppens / Pexels
Embarking on the journey of oil painting is an exciting adventure, and the first step is often the most daunting: selecting your paints. For beginners, the sheer variety can be overwhelming, but understanding the basics will empower you to make informed choices. The primary distinction you'll encounter is between artist-grade and student-grade paints. Artist-grade paints boast higher pigment concentration, finer milling, and often single pigments, resulting in more vibrant colors and better lightfastness. However, they come with a significantly higher price tag. For those just starting, student-grade oil paints are an excellent and highly recommended choice. These paints contain less pure pigment and more fillers, making them more affordable without compromising too much on quality for learning purposes. They still offer good color saturation and handling characteristics, perfect for experimenting and developing your skills without the financial pressure of wasting expensive materials. When building your initial palette, you don't need every color under the sun. A limited, foundational palette is not only cost-effective but also incredibly educational, forcing you to learn color mixing thoroughly. A good starting point includes a cool and warm version of each primary color, plus a few essential neutrals. Consider a set comprising: Cadmium Yellow Hue (warm yellow), Lemon Yellow (cool yellow), Cadmium Red Hue (warm red), Alizarin Crimson (cool red), Ultramarine Blue (warm blue), Phthalo Blue (cool blue), Titanium White, and Ivory Black. Some artists prefer Burnt Umber or Raw Umber over black for a more natural dark. Titanium White is crucial for lightening and creating opaque mixes, while a transparent white like Zinc White can be added later for glazing. Many starter sets are available that conveniently package these essential colors, offering a cohesive and cost-effective entry point. Always check the lightfastness rating (often indicated by ASTM ratings like I, II, III or stars) to ensure your artwork will endure over time. While student-grade paints might have slightly lower ratings than artist-grade, good quality student lines still offer excellent durability for learning. Remember, the goal is to get painting and understand how colors interact, not to break the bank on materials you might not fully utilize yet. Focus on understanding the properties of each color – its transparency, tinting strength, and drying time – as this knowledge will be invaluable as you progress. Learning about color theory can significantly enhance your paint selection and mixing skills. Opting for larger tubes of white and earth tones (like Umber or Sienna) can be a wise economic decision, as these colors are often used in greater quantities for mixing and underpainting. Don't forget that different brands might have slight variations in hue and consistency, so don't be afraid to try a few to find what you prefer.

Essential Brushes and Painting Surfaces for Beginners
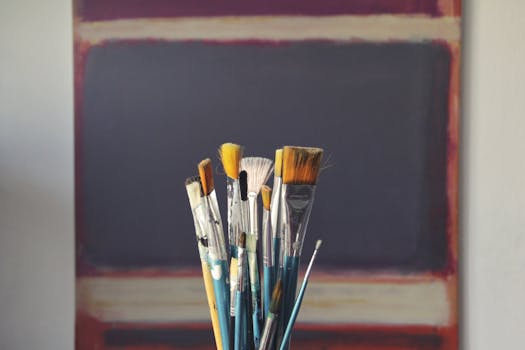
A set of paintbrushes in front of an abstract canvas, reflecting creativity and inspiration. Photo: Pixabay / Pexels
Beyond the paint itself, your choice of brushes and painting surfaces plays a pivotal role in your oil painting experience. For beginners, it's easy to get lost in the myriad of brush shapes, sizes, and hair types. To simplify, focus on acquiring a small, versatile selection that will allow you to explore different marks and textures. The most common brush types for oil painting include flats, brights, filberts, rounds, and liners. Flats have long, square bristles and are excellent for bold strokes and covering large areas. Brights are similar but have shorter bristles, offering more control for impasto work. Filberts are oval-shaped, providing softer edges and blending capabilities. Rounds come to a point and are good for details and fine lines, while liners are extra-long, thin rounds perfect for very delicate work. For beginners, a set of 3-5 synthetic brushes in varying sizes (e.g., a large flat, a medium filbert, a small round) will be more than sufficient. Synthetic brushes are generally more affordable, durable, and easier to clean than natural hair brushes, making them ideal for the initial learning phase. Look for brushes with good spring and shape retention. Equally important is your choice of painting surface. Oil paints require a non-absorbent, acid-free surface that has been properly primed to prevent the oil from soaking into the fibers and causing deterioration over time. The most common and accessible surfaces for beginners are stretched canvases and canvas panels. Stretched canvases offer a traditional feel and come ready to paint, typically pre-primed with acrylic gesso. They are lightweight and easy to hang. Canvas panels, also known as canvas boards, are less expensive, more rigid, and take up less storage space, making them excellent for practice and studies. They are usually made of canvas glued to a rigid board, also pre-primed. For an even more economical option, you can purchase unprimed canvas or MDF boards and prime them yourself with 2-3 coats of acrylic gesso. This process offers valuable insight into material preparation, though it adds an extra step before you can start painting. Avoid using unprimed paper or cardboard, as the oil will degrade them quickly. When selecting canvases or panels, consider the size. Starting with smaller sizes (e.g., 8x10 inches or 9x12 inches) is often less intimidating and allows you to complete more studies without feeling overwhelmed. As you gain confidence, you can gradually move to larger formats. Remember to always have a few extra surfaces on hand, as you'll likely want to experiment and practice repeatedly without the pressure of perfecting a single piece.

Essential Mediums, Solvents, and Studio Setup Considerations
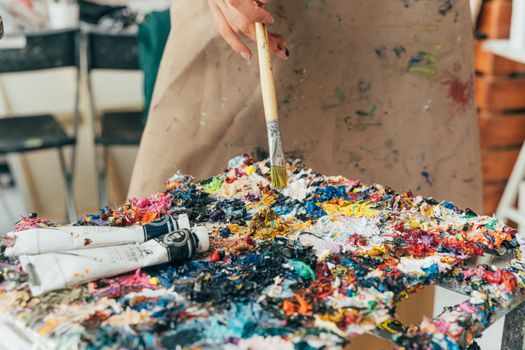
Vibrant paint palette with brush and tubes in an artist's studio setting. Photo: AI25.Studio Studio / Pexels
Beyond paints and brushes, a few essential mediums and solvents are crucial for a successful oil painting practice, especially for beginners. Mediums are substances added to oil paints to alter their consistency, drying time, sheen, and transparency. For starters, a general-purpose painting medium, often a blend of linseed oil and a solvent, is highly recommended. Linseed oil is a popular choice as it increases paint flow, transparency, and gloss, while also slowing down drying time. However, using too much linseed oil can make your paint film brittle over time, so moderation is key. Another excellent beginner-friendly medium is Liquin Original (by Winsor & Newton) or Galkyd (by Gamblin), which are alkyd-based mediums. These mediums significantly speed up drying time, making them invaluable for layered painting and for artists who prefer a faster workflow. They also increase flow and transparency without compromising durability. Start with just one or two mediums to understand their effects before diversifying. Solvents are primarily used for thinning paint and, more importantly, for cleaning brushes. Historically, turpentine was the go-to solvent, but its strong fumes and toxicity make it less ideal for home studios, particularly for beginners. Odorless mineral spirits (OMS) are a much safer and more pleasant alternative. Look for artist-grade, odorless mineral spirits like Gamsol (by Gamblin) or Turpenoid Natural. These products have had most of their aromatic hydrocarbons removed, drastically reducing their odor and toxicity while still being effective at thinning paint and cleaning brushes. Always work in a well-ventilated area regardless of the solvent you use. You'll also need a brush cleaner or soap specifically designed for oil paints to ensure your brushes last. A good, inexpensive option is a bar of household soap, like Fels-Naptha, or specialized artist's brush soap. Proper brush care is vital for extending the life of your tools. Finally, setting up your studio space effectively is paramount for an enjoyable and productive painting experience. Ventilation is non-negotiable when working with oil paints and solvents. If you don't have a dedicated studio with an exhaust fan, ensure you paint near an open window or use a fan to circulate air. You'll need a palette for mixing colors. Traditional wooden palettes are beautiful but require conditioning and regular scraping. Disposable paper palettes are convenient for beginners as they eliminate the need for extensive cleaning. Glass or ceramic tiles also make excellent non-absorbent palettes that are easy to clean. Rags or paper towels are essential for wiping brushes and cleaning up spills. An easel, whether a tabletop or freestanding studio easel, will provide a comfortable working angle, but if an easel isn't immediately feasible, you can prop your canvas against a wall or sturdy box. A sealed container for solvent and a separate one for dirty rags (to prevent spontaneous combustion from oil-soaked materials) complete your basic setup. Remember, a clean, organized, and well-ventilated workspace contributes significantly to your focus and enjoyment.

Tips for Beginners and Common Pitfalls to Avoid
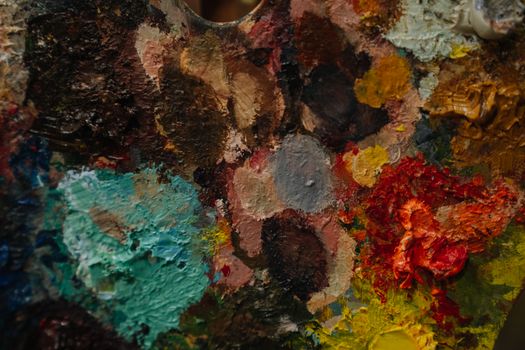
Close-up of a colorful artist's palette with various paint blobs and textures. Photo: Huy Nguyễn / Pexels
Starting with oil painting can be incredibly rewarding, but like any new skill, it comes with its own set of challenges. Here are some essential tips to help beginners navigate the initial stages and avoid common pitfalls: * **Start with a Limited Palette:** As mentioned, a restricted set of colors forces you to learn color mixing intimately. You'll be amazed at the range of hues you can create from just a few primaries, white, and a dark earth tone. This also simplifies decision-making and reduces overwhelm. * **Understand 'Fat Over Lean':** This is a golden rule in oil painting. It means applying layers of paint with more flexibility (more oil/medium) over layers with less flexibility (less oil/medium). If you paint a 'lean' layer over a 'fat' one, the top layer will dry faster and become brittle, leading to cracking. Generally, your initial layers should be thinned with solvent, and subsequent layers should gradually incorporate more oil or medium. Alkyd mediums can simplify this, as they dry consistently. * **Work in a Well-Ventilated Area:** This cannot be stressed enough. Even odorless mineral spirits emit fumes. Good airflow is crucial for your health and comfort. * **Clean Your Brushes Properly:** Allowing paint to dry in your brushes will ruin them quickly. Clean them thoroughly with solvent, then wash with soap and water, reshaping them before storage. This extends their life and saves you money. * **Don't Be Afraid to Make Mistakes:** Oil paint is forgiving. You can scrape off wet paint, paint over dried areas, or even wipe down an entire canvas and start fresh. Embrace experimentation and view 'mistakes' as learning opportunities. * **Use Reference Photos Wisely:** While helpful, don't feel chained to a reference photo. Use it as a starting point, but allow your artistic interpretation to take over. Focus on capturing the essence rather than exact replication. * **Practice Value Studies:** Before diving into full color, practice painting in monochrome (using only black, white, and one other color, like burnt umber). This helps you understand light and shadow, which are fundamental to creating form and depth. * **Be Patient with Drying Times:** Oil paints dry slowly. This is a blessing for blending but requires patience for layering. Plan your painting sessions accordingly. Alkyd mediums can speed this up. * **Avoid Overworking Areas:** Sometimes, the best solution is to step away and let an area dry, rather than continuing to blend and muddy colors. Fresh eyes often reveal the path forward. * **Invest in Quality Over Quantity:** While student-grade paints are good, avoid the cheapest, lowest-quality materials. They can be frustrating to work with and hinder your learning. A small set of decent student-grade supplies is better than a large set of poor ones. By keeping these tips in mind and avoiding common pitfalls, your journey into oil painting will be much smoother and more enjoyable. Embrace the process, have fun, and watch your skills grow.

Comparison

FeatureBest Option (Beginner)Alternative 1 (Budget)Alternative 2 (Upgrade)
Paint GradeStudent-GradeCraft Oils (Not Recommended)Artist-Grade
BrushesSynthetic Filbert SetHog Bristle FlatsSable/Kolinsky Rounds
SurfacePre-primed Canvas PanelsGessoed CardboardLinen Stretched Canvas
SolventOdorless Mineral Spirits (OMS)Turpentine (Ventilate!)Citrus-based Solvents
PaletteDisposable Paper PalettePlastic PaletteGlass Palette
Drying Time ControlAlkyd Medium (Liquin)Linseed OilStand Oil

What Readers Say

"This guide made choosing art supplies for oil painting beginners so much easier! I was completely lost, but now I have a clear list and feel confident starting my first canvas. The tips on solvents were particularly helpful."

Sarah J. · Austin, TX

"As someone who's always wanted to try oil painting, the section on student-grade paints was a game-changer. I bought a recommended set and am already enjoying the process without the fear of wasting expensive materials."

Mark D. · Portland, OR

"I followed the advice on a limited palette and couldn't believe the vibrant colors I could mix. My first still life turned out much better than I expected, all thanks to understanding the right art supplies for oil painting beginners."

Emily R. · Chicago, IL

"The article is very comprehensive, though I wish there were a few more specific brand recommendations for each item. Still, the breakdown of brushes and surfaces was invaluable for a complete novice like me."

David L. · Miami, FL

"I'm transitioning from acrylics to oils, and this guide to art supplies for oil painting beginners clarified many differences. The 'fat over lean' explanation was particularly clear and helped me avoid early mistakes."

Olivia M. · Denver, CO

Frequently Asked Questions

What are the absolute must-have art supplies for oil painting beginners?

The absolute must-haves for oil painting beginners include a basic set of student-grade oil paints (a primary palette with white), 3-5 synthetic brushes (a mix of flats, filberts, rounds), pre-primed canvas panels or stretched canvas, odorless mineral spirits for cleaning and thinning, a palette, and rags. This minimal setup allows you to start painting effectively.

Is oil painting too difficult for a complete beginner?

No, oil painting is not too difficult for a complete beginner. While it has a learning curve, its slow drying time makes it very forgiving for blending and correcting mistakes. With the right basic art supplies for oil painting beginners and a willingness to practice, anyone can learn and enjoy this medium.

How do I clean my oil painting brushes properly?

To clean oil painting brushes, first wipe off as much excess paint as possible with a rag. Then, swirl the brush in odorless mineral spirits to dissolve residual paint, wiping it clean on a rag. Finally, wash the brush thoroughly with warm water and artist's brush soap (or mild household soap), rinse, and reshape the bristles before letting it air dry.

How much should I expect to spend on art supplies for oil painting beginners?

For a quality basic setup of art supplies for oil painting beginners, you can expect to spend between $75-$150. This typically includes a student-grade paint set, a few brushes, a couple of canvases, odorless mineral spirits, and a palette. Investing a bit more initially often leads to a less frustrating and more rewarding experience.

Can I use acrylic brushes for oil painting?

Yes, you can absolutely use synthetic acrylic brushes for oil painting, especially as a beginner. Synthetic brushes are versatile, durable, and clean up well with both water (for acrylics) and solvents (for oils). While natural hair brushes like hog bristle are traditionally favored for oils, synthetics are an excellent, cost-effective starting point.

Who should consider oil painting as their first art medium?

Oil painting is an excellent first art medium for individuals who enjoy working slowly, appreciate deep, rich colors, and are comfortable with the unique properties of oil-based materials. It's particularly good for those who want to learn traditional painting techniques and enjoy the blending capabilities that oils offer.

Are there any safety concerns with oil painting supplies?

Yes, there are some safety concerns. The main ones involve proper ventilation when using solvents like mineral spirits, as fumes can be irritating or harmful. Some pigments (e.g., cadmium colors) contain heavy metals, so avoid ingesting paint or direct skin contact, and always wash hands thoroughly after painting. Proper disposal of oil-soaked rags is also crucial to prevent spontaneous combustion.

What are the emerging trends in oil painting supplies for beginners?

Emerging trends in oil painting supplies for beginners include an increased focus on non-toxic and low-odor alternatives, such as water-mixable oil paints and increasingly effective odorless mineral spirits. There's also a growing availability of comprehensive, curated starter kits that simplify the initial purchasing process, and a rise in eco-friendly brush and palette options.

Ready to transform your creative aspirations into tangible art? With the right art supplies for oil painting beginners, your artistic journey begins today. Gather your essential tools, find your inspiration, and immerse yourself in the timeless beauty of oil painting.

Topics: art supplies for oil painting beginnersoil painting starter kitbeginner oil paintsoil painting brushesoil painting canvas
Leo List

DK Escorts LU Escorts AT Escorts SE Escorts FI Escorts CH Escorts DE Escorts HR Escorts IE Escorts GR Escorts CZ Escorts NO Escorts BE Escorts FR Escorts SI Escorts IL Escorts NL Escorts PL Escorts HU Escorts ES Escorts IT Escorts PT Escorts SK Escorts RO Escorts ZA Escorts UY Escorts US Escorts UK Escorts NZ Escorts AU Escorts
Brampton weed
Adultwork EstrelaBet Vai de Bet R7 Bet Betão Galera Bet Rainbet Bet9ja Shop SportyBet BetKing Sisal Loto Foot Hollywoodbets YesPlay Odibets RushBet Jugabet BetWarrior BetCity MSport betPawa Fortebet